How to Build a Roll Cage: A Step-by-Step Garage Guide
How to build a roll cage step by step: rulebook first, then layout, templates, bending, notching, fit-up and an expert review before final welding.

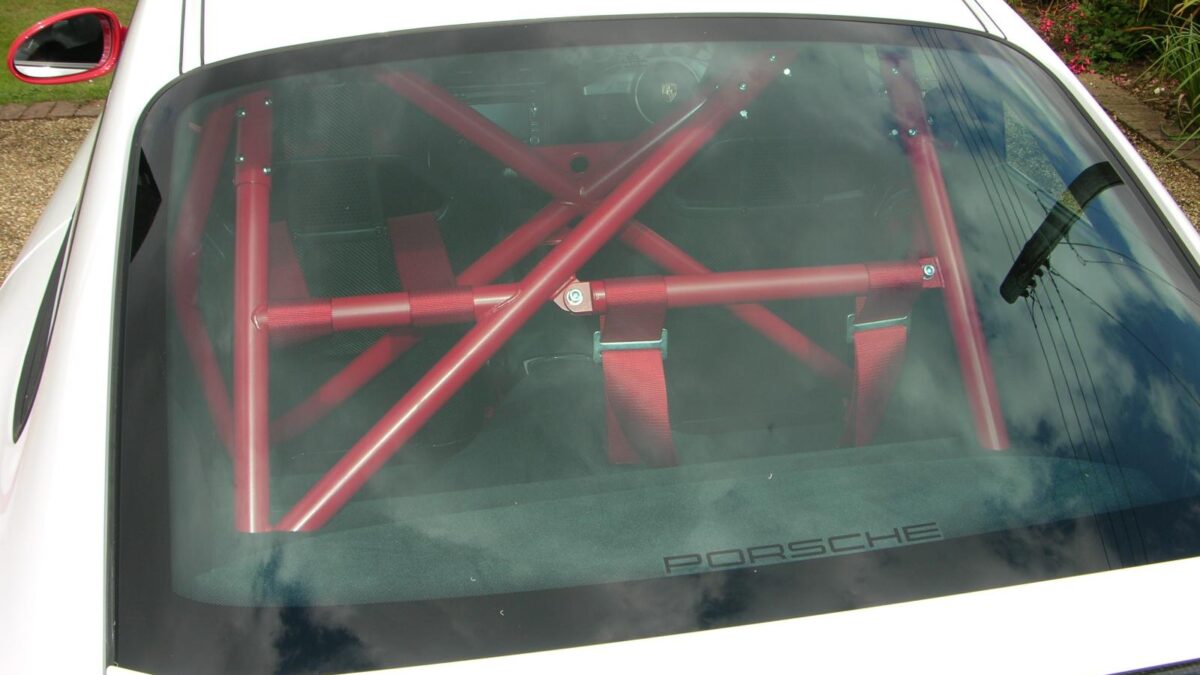
Building your own cage is one of the most satisfying jobs in fabrication. It’s also one of the most serious. If you’re wondering how to build a roll cage in your own garage, you’re in the right place. But let’s be honest from the first line: this is a part that protects a life.
This guide walks you through the whole job in order. You’ll start with the rulebook, then plan the layout, measure the car and make templates. After that comes bending, notching and fit-up. Finally, you’ll tack it, get it checked and hand off the final welding if you need to. Every step explains why it matters and how to do it.
Here’s what this guide won’t do. It won’t promise that your cage will pass tech. Benders Hub is not a tech inspector or an engineer. Your sanctioning body’s current rulebook decides the tube, wall, material, bend radius and welding method. We strongly recommend a review by your tech inspector or a professional cage builder before you buy tube, and again before final welding.
Build a cage in this order, and get expert eyes on it at the key points.
- Rulebook first: it sets material, OD, wall, bend radius, mounting and welding. See step 1.
- Plan, template, then bend: mock up every bar before you cut real tube. Use a rotary-draw bender, never a bottle-jack pipe bender.
- Notch tight, tack, then review: have your inspector or a pro check the tacked cage before final welding. See step 7.
📋 In this guide
- How to build a roll cage: is DIY right for you?
- Step 1: Start with the rulebook
- Step 2: Plan the layout
- Step 3: Tools and tube
- Step 4: Measure and make templates
- Step 5: Bend the main hoop and bars
- Step 6: Notch and fit up
- Step 7: Tack, review, then weld
- Real-life lessons
- Common mistakes and fixes
- Pro tips
- FAQ
- Your roll cage build checklist
How to build a roll cage: is DIY right for you?
Before you buy a bender or a stick of tube, ask yourself a straight question. Should you build this cage? Plenty of home builders do it well. Plenty of others start, stall and end up paying a pro to fix it. Here’s how to tell which side you’re on.
DIY can make sense if…
- You’re comfortable with accurate measuring, cutting and fitting.
- You have, or can borrow, a rotary-draw bender with dies that meet your rules.
- You can weld to the standard your rulebook requires, or you’ll hire someone who can.
- You have time. A first cage takes far longer than the videos suggest.
- You’ll get your inspector or a professional to review it along the way.
Consider a pro if…
- Your class needs a certified chassis or a homologated cage.
- Your rulebook requires TIG welding for your tube and you can’t TIG well yet.
- You can’t get the car to a solid, level work area for weeks at a time.
There’s a middle path, too. Many builders do the planning, bending, notching and tacking themselves. Then a qualified welder does the final welding. You save money, learn a lot and still get pro-quality joints.
Benders Hub is not a tech inspector or an engineer, and no guide can promise a cage will pass inspection. Confirm your plan with your current rulebook and your tech inspector before you buy tube. Get the tacked cage reviewed before final welding.

Step 1: Start with the rulebook
Every sanctioning body publishes its own cage rules. They decide the tube material, OD, wall, bend radius, mounting, required bars and often the welding method. Read the current edition for your class before you do anything else. Classes often have their own supplements, too.
What we confirmed on official sites
SCCA Time Trials: the full safety rules list seamless or DOM mild steel (SAE 1020 or 1025 recommended), alloy steel (SAE 4130 or T45) or Docol R8. Alloy and mild steel may not be mixed, and ERW is not allowed. Bend radius at the tube centerline must be at least three times the tube diameter. Tube size scales with vehicle weight. Alloy welding must follow accepted industry practice, and a certified AWS D1.1 welder is recommended, not required.
NHRA: the General Regulations posted on NHRA’s site (2017 and 2019 editions) require approved TIG (heliarc) welding for 4130 chromoly, and approved MIG or TIG for mild steel. Their roll cage section also says cages must be designed in an attempt to protect the driver from any angle, 360 degrees. NHRA says its digital 2026 Rulebook includes amendments through July 14, 2026, with 2026–2027 amendments taking effect January 1, 2027 (NHRA Racer rules).
SFI, FIA and NASA: quicker drag cars may need a chassis built to an SFI 25-series spec. SFI’s 25.1K and 25.5E revisions took effect July 2, 2021 (SFI). FIA Appendix J, Article 253, specifies cold-drawn seamless carbon steel with a 350 N/mm² minimum tensile strength; the 2026 text is dated 10 December 2025 (FIA). NASA’s 2026 Spec 3 rules say racers follow the Club Codes and Regulations (CCR) in effect on the date of competition (NASA Spec 3 rules). The CCR itself is on NASA’s rules page.
| Sanctioning body | Where it’s published | What the rules cover |
|---|---|---|
| NHRA | nhraracer.com, Rules | Cage and bar design, tube tables, welding, chassis certification by ET |
| SCCA | scca.com and timetrials.scca.com | Material, size by weight, bend radius, mounting, welding, padding |
| NASA | drivenasa.com rules page (CCR) | Cage requirements by class, tube tables, mounting |
| FIA | fia.com, Appendix J Art. 253 | Material, dimensions, homologation, cage drawings |
| SFI | sfifoundation.com | Drag-racing chassis specs and certification |
Want the size details in one place? Our roll cage specifications guide points to each rulebook.
Step 2: Plan the roll cage layout
A good cage starts on paper, not on the bender. Planning is where you decide which bars you need, where they go and how they meet. It’s also where you protect your own headroom and your exits.
Know the main parts
- Main hoop: the big hoop behind the seats. It’s usually the first part you build, and everything else ties into it.
- Front hoop or front downbars: run along the windshield pillars toward the floor.
- Door bars: protect you from side impacts. Rulebooks often say how many and where.
- Rear braces: run from the main hoop back to the chassis.
- Diagonals and extra bars: add triangulation, depending on your rules and design.
Your rulebook decides which of these are required, and it may include drawings. Start from those drawings, not from a cool build you saw online.
Plan around the driver
Sit in the car in your seat, wearing your helmet. Check head clearance under the planned bars. Think about how you’ll get in and out quickly. Think about where the harness mounts and the seat go. A cage that fits the car but not the driver is a problem.
Plan the joints
Every bar ends somewhere: on a mounting plate, on the main hoop or on another bar. Mark each joint on your sketch. Number the bars in the order you’ll fit them. Our fabrication workflow tool can help you sequence the job.
Take your layout sketch and tube plan to your tech inspector before you buy anything. It’s a short conversation that can save an expensive rebuild.
Step 3: Tools and tube you’ll need
A cage needs a handful of serious tools. The most important is the bender. It has to bend your tube without kinking it, at a radius your rules allow.
The bender
Use a rotary-draw bender. It clamps the tube to a round die and draws it around, giving smooth, round bends. Never use a ram-style bottle-jack “pipe bender” for cage tube. Harbor Freight’s own manual for its 12-ton bender says it isn’t intended for thin-wall pipe. Your bender needs a published rating for your tube’s OD, wall and material. Our best tube bender for a roll cage guide compares the options.
Dies and radius
Your die sets the centerline radius (CLR). Check it against your rulebook’s minimum. Baileigh notes popular off-road dies of 1.5″ and 1.75″ OD at about 5.5″ and 6.5″ CLR. See our roll cage bend radius guide for the details.
| Tool | Why you need it | Tip |
|---|---|---|
| Rotary-draw bender | Smooth, round, repeatable bends | Check the published rating for your tube |
| Die set | Sets OD and bend radius | Match your rulebook’s minimum radius |
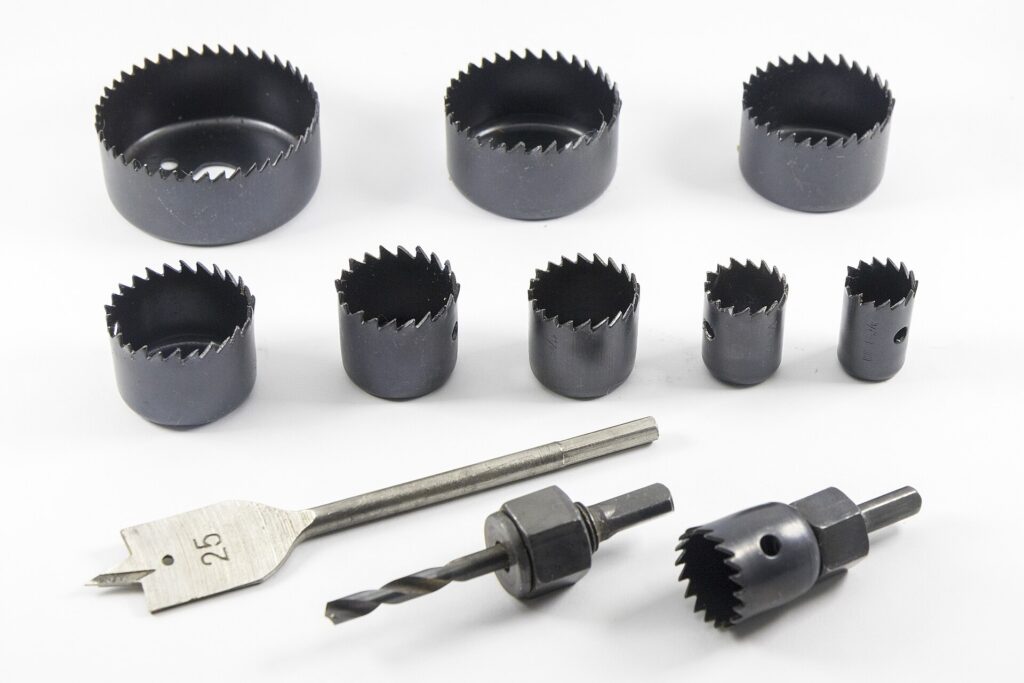
| Tube notcher and hole saws | Tight fishmouth joints | Hole saw size matches the tube you join to |
| Cut-off saw | Square, clean cuts | Deburr every cut |
| Digital angle finder | Measures true bend angles | Zero it on a known surface first |
| Calipers and tape | Checks OD, wall and lengths | Measure tube before you buy dies |
| Welder | Tacks and final welds | The process must match your rules |
The tube
Buy the material, OD and wall your rulebook lists for your class and weight. Ask for mill certs. Not sure between mild steel and chromoly? Read our guide to DOM vs 4130 chromoly roll cage tube. Buy extra for test bends and mistakes.
As an Amazon Associate I earn from qualifying purchases.
A notcher worth owning
Eastwood Tube & Pipe Notcher (0°–60°)
Hole-saw notcher for round tube up to 2″, adjustable from 0° to 60°.
A cage has dozens of joints, and every one needs a fishmouth cut. This notcher clamps your tube and guides a hole saw through it at the angle you set. It runs from a hand drill or a drill press.
Who it’s for: anyone building a cage with round tube up to 2″. Match the hole saw to the OD of the tube you’re joining to.
- Round tube
- Up to 2″
- Angle range
- 0°–60°
- Drive
- Hand drill or drill press
- Hole saws
- Not included
Alternative: Woodward Fab 2″ hole-saw notcher. Affiliate links. See our disclosure.
Step 4: Measure the car and make templates
This is the step that separates clean cages from frustrating ones. Bending tube is the easy part. Knowing exactly what shape to bend is the hard part. Templates bridge that gap.
Prepare the car
Strip the interior where the cage will go. Set the car on a level, solid surface and keep it there for the whole build. Measure the floor and pillars where the bars will run. Mark your mounting plate locations. Your rulebook sets plate requirements, so check them before you cut anything.
Make a template for each bar
Bend a piece of stiff wire, thin conduit or welding rod to the shape you want. Hold it in place in the car. Adjust it until it clears the roof, pillars and driver. Then lay the template flat and trace it onto cardboard or the shop floor. Some builders mock up tricky bars with PVC pipe first. JD2 also publishes a template bending tutorial that walks through the idea.
Turn the template into numbers
From the template, measure each straight and each angle. Then work out where each bend starts. Two bits of geometry help:
- Arc length = CLR × angle in radians. A 90° bend on a 6″ CLR die uses about 9.42″ of tube.
- Tangent length = CLR × tan(angle ÷ 2). For a 90° bend, the tangent equals the CLR.
Our bend calculator does this math for you. The geometry visualizer shows how CLR and angle change the shape. For a full walkthrough, read how to lay out tube bends.
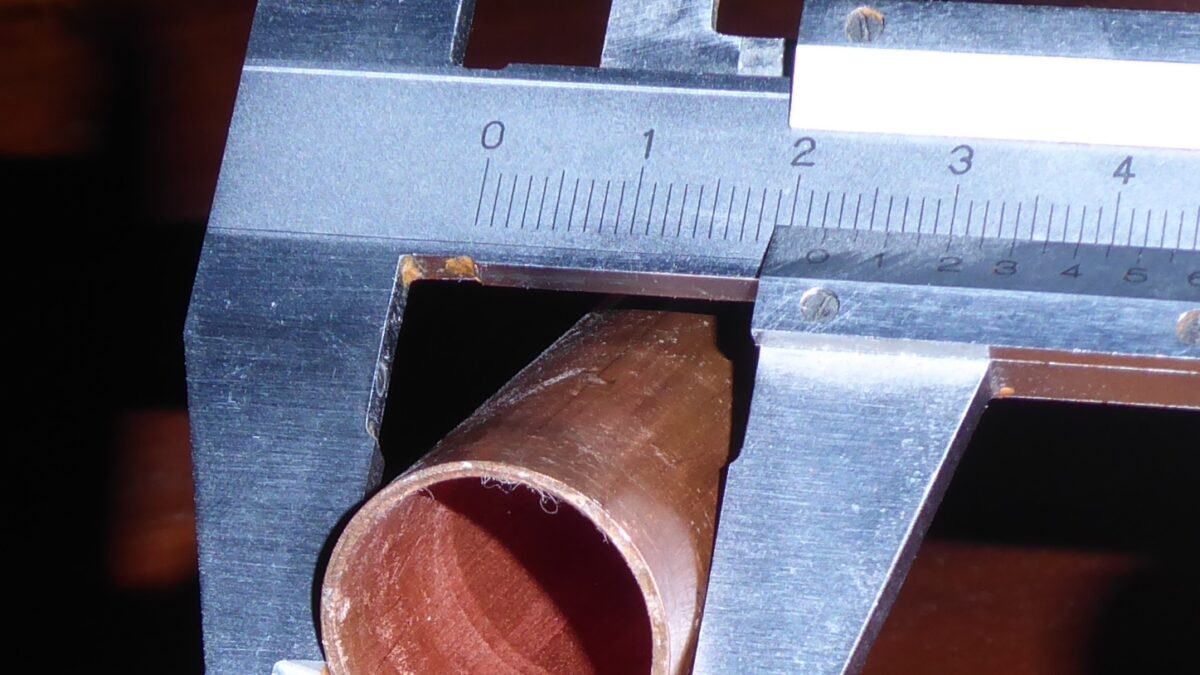
Step 5: Bend the main hoop and other bars
Now the fun part. The main hoop usually comes first because so many bars tie into it. Take your time. A main hoop that’s slightly off throws every other bar off too.
Test-bend first
Cut a scrap piece from the same tube and bend it to 90°. Release it, then measure the true angle with a digital angle finder. The difference is your springback. JD2 says 4130 springs back about twice as much as mild steel of the same size and wall. Log the result with the tube’s heat number.
Bend the main hoop
- Cut the tube long. Leave extra length on both legs so you can trim to fit.
- Draw a reference line. Run a straight line along the tube. It shows any rotation in the die.
- Mark the first bend. Measure from your template and mark where the bend starts.
- Make the first bend. Pull smoothly to your target plus your measured springback.
- Rotate and mark the second bend. Keep both bends in the same plane using your reference line.
- Make the second bend. Check it against your template before you release.
- Test fit in the car. Check width, height and head clearance. Trim the legs only when it fits.
Bend the rest in order
Work through your numbered list. Bend, test fit, then move on. For bars with bends in two directions, keep the reference line visible and use an angle finder to set rotation between bends. A small rotation error between bends turns a neat bar into a twisted “dog-leg,” so check twice before each pull.
Rotary-draw benders need a straight section to clamp. Plan each bar so there’s always enough straight tube for the clamp block, or leave extra length and trim later.
Step 6: Notch and fit up every joint
A bent bar is only half done. Its ends must meet other tubes and plates with tight, clean joints. That’s where notching comes in. A notched tube end has a curved “fishmouth” cut, so it saddles onto the tube it joins.
How to notch
- Pick the hole saw. Match it to the OD of the tube you’re joining to, not the tube you’re cutting.
- Set the angle. Measure the angle where the two tubes meet. Set the notcher to match.
- Set the rotation. If the bar has bends, line up your reference line so the notch faces the right way.
- Cut slowly. Use cutting fluid and steady pressure. Let the saw do the work.
- Test fit. Hold the bar in place and look for gaps. Trim and repeat until it sits tight.
What good fit-up looks like
The joint should sit snugly all the way around, with no big gaps or light showing through. Tight joints are easier to weld well. Big gaps make welding harder and can weaken the joint. Clean each joint area to bare metal before tacking. Our tube notching guide goes deeper on angles and setup.
Fit bar by bar
Fit one bar at a time. Clamp or tack it lightly, then fit the next. Check that earlier bars haven’t moved. Measure diagonals side to side to keep the cage square.
Step 7: Tack, review, then hand off final welding
Once every bar fits, the cage is held together with small tack welds. This is your last cheap chance to fix anything. Don’t rush past it.
Tack and check
Tack each joint in a few spots. Then check everything. Measure side to side. Sit in the seat with your helmet on. Check door bar position, head clearance and exits. Compare the layout with your rulebook’s drawings and requirements.
Get it reviewed before final welding
This is the step we’d never skip. Take the tacked cage to your tech inspector or a professional cage builder, or invite them to look. Ask them to check the layout, tube, joints and mounting before anything is fully welded. A tacked joint is easy to cut and redo. A fully welded one is not. Even after a good review, nobody can promise the finished cage will pass. Final inspection judges the finished work.
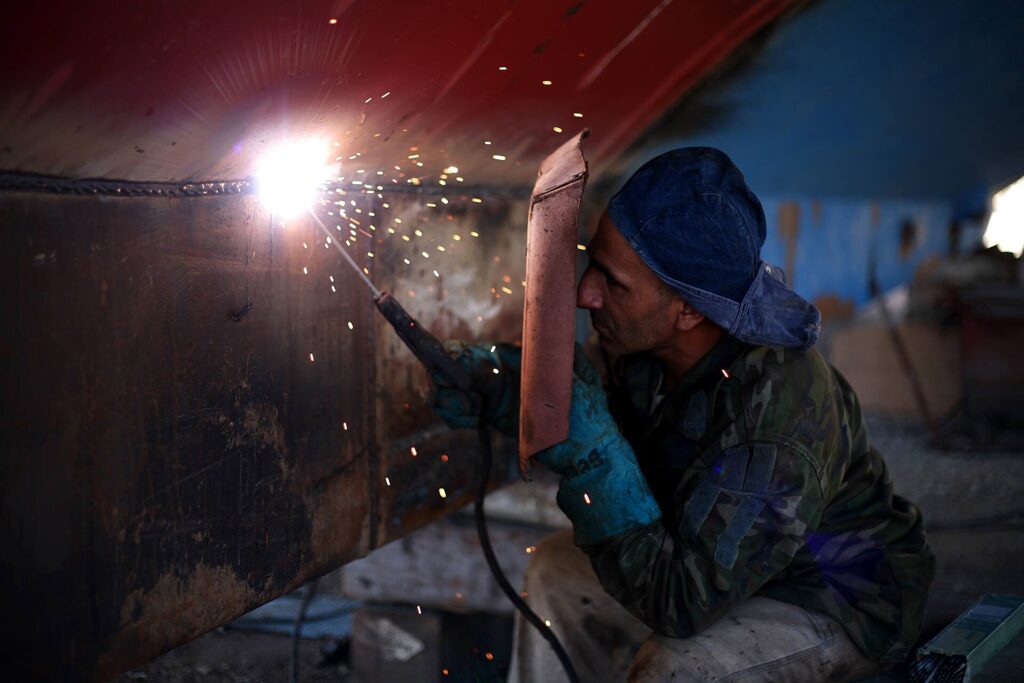
Final welding
The rulebook sets the welding method. NHRA’s 2017 and 2019 General Regulations require TIG for 4130 and allow MIG or TIG for mild steel. SCCA Time Trials says alloy steel welding must follow accepted industry practice and recommends a certified AWS D1.1 welder. If you can’t weld to that standard yet, hand off the final welding to a qualified welder. It’s a smart choice, not a failure.
Welding inside a car brings fire risk. Remove flammable trim, carpet and fluids from the area, and keep an extinguisher close. Read our workshop safety notes first.
A tacked cage is a draft. Get expert eyes on it while mistakes still cost minutes, not weekends.
Real-life lessons from cage builders
These are composite stories. The same situations come up again and again in garage-fab forums and build threads. Each one costs far less to learn here.
A builder copies a cage layout from a popular video and fully welds it. At tech, the inspector points out that the class needs a different door bar setup. Several bars have to be cut out and redone.
Lesson: build to your own rulebook, and show your plan to the inspector before you weld.
Someone tries to save money by bending cage tube on a 12-ton ram pipe bender. The bends come out flattened and kinked. The tube is scrap, and they end up buying a rotary-draw bender anyway.
Lesson: cage tube needs a rotary-draw bender and the right die.
A builder fits a beautiful main hoop and front hoop without sitting in the car. Once the seat goes in, their helmet touches a bar. The front hoop has to be rebuilt.
Lesson: check head clearance with your seat and helmet at every stage.
Someone tacks their cage and asks a local cage builder to look it over. The builder spots a gap at one joint and a bar that’s off line. Both are fixed in an afternoon before final welding.
Lesson: a review at the tack stage is cheap insurance.
Common roll cage building mistakes (and how to fix them)
Most cage regrets come from a short list of mistakes. Here they are, with the fix for each.
❌ Buying tube before reading the rulebook. The material, OD or wall turns out wrong for your class.
✅ Fix: read the current rulebook and supplement, confirm with your inspector, then buy tube.
❌ Using a ram “pipe bender.” It flattens and kinks thin-wall cage tube.
✅ Fix: use a rotary-draw bender with a die that meets your rulebook’s minimum radius.
❌ Skipping templates. Bars come out too long, too short or in the wrong shape.
✅ Fix: template every bar in wire or PVC, then turn it into bend marks.
❌ Ignoring springback. Every bend lands a few degrees short.
✅ Fix: test-bend the real tube, measure the true angle and log your offset.
❌ Gappy notches. Big gaps make welding harder and joints weaker.
✅ Fix: match the hole saw to the tube you’re joining to, set the angle carefully and trim until it fits tight.
❌ Final welding with no review. Problems get locked in.
✅ Fix: tack the cage and have your inspector or a pro review it before final welding.
❌ Using the wrong welding process. NHRA’s 2017 and 2019 rulebooks require TIG for 4130.
✅ Fix: check your rulebook’s welding section. Hire a qualified welder if you can’t meet it.
Pro tips for a cleaner cage build
These habits come up again and again among builders whose cages look tidy and go together without drama. None of them costs much.
- 💡 Build on a level surface. Keep the car in one spot for the whole job, so your measurements stay true.
- 💡 Number every bar. Write the bar number and bend marks on the tube. It keeps the job organized.
- 💡 Keep a bend log. Record tube, die, heat number, target angle and true angle.
- 💡 Bend extra test pieces. One stick of practice tube is cheaper than one ruined main hoop.
- 💡 Check diagonals. Measure corner to corner on each side. Equal diagonals mean a square cage.
- 💡 Think about access. Plan for seat removal, harness mounting and quick exits before you weld.
- 💡 Ask early, ask often. Inspectors and pro builders would rather answer a question now than fail a cage later.
Experienced builders treat everything before final welding as a draft. They tack lightly, check often and cut out anything that isn’t right. The finished cage reflects all those small corrections.
Not sure your bender is up to cage work? Our Find My Bender quiz asks a few questions and explains its pick.
Frequently asked questions
Can I build my own roll cage?
Many home builders do. You need a rotary-draw bender, a notcher, good measuring habits and welding to your rulebook’s standard. We strongly recommend a review by your tech inspector or a pro before final welding.
What tube should I use for a roll cage?
Whatever your rulebook lists for your class and car weight. SCCA Time Trials, for example, allows seamless or DOM mild steel, 4130, T45 or Docol R8, but not ERW. Always check your own series.
What bend radius does a roll cage need?
Your rulebook sets it. SCCA Time Trials requires at least three times the tube diameter at the centerline. Check your series and buy a die that meets it.
Can I MIG weld a roll cage?
It depends on the rules and the material. NHRA’s 2017 and 2019 General Regulations allow MIG or TIG for mild steel, but require TIG for 4130. Check the current edition for your class.
Will my homemade cage pass tech?
Nobody can promise that before inspection. Build to the current rulebook, have your plan and tacked cage reviewed, and weld to the required standard. The inspector makes the final call.
Your roll cage build checklist
Use this list as you go. Tick each item before you move to the next stage.
- I’ve read the current rulebook and any class supplement
- I’ve shown my layout and tube plan to my tech inspector
- My tube matches the listed material, OD and wall, and I have mill certs
- My bender is rotary draw and rated for my tube
- My die meets the rulebook’s minimum bend radius
- I’ve made a template for every bar
- I’ve test-bent the real tube and logged my springback
- Every joint is notched and fits tight with no big gaps
- The tacked cage has been reviewed by my inspector or a pro
- Final welding uses the process my rulebook requires
- My work area is clear of flammables, with an extinguisher close
Building a cage is a big project, but it’s a series of small, careful steps. Read the rules, plan on paper, template every bar, and get expert eyes on it before final welding. Do that, and you’ll end up with a cage you can be proud of. 🔧
Ready to plan your first bar?
Work out arc length, tangent length and cut length in seconds. Or see how CLR and angle shape a bend.
Keep reading
Bending Stainless Exhaust Tubing: Mandrels, Springback & Test Bends
Bending stainless exhaust tubing without wrinkles: when you need a mandrel, how to measure springback with a test bend, and how to…
Exhaust Tube Cut Length: Step-by-Step Maths for J-Bends and U-Bends
Work out exhaust tube cut length the easy way: arc and tangent formulas, plus three worked J-bend and U-bend examples with every…
Buy Mandrel Bends vs Bend Your Own Exhaust: An Honest Guide
Buy mandrel bends vs bend your own exhaust? Compare effort, tools and results, then build a system from pre-bent U-bends step by…