Bending Stainless Exhaust Tubing: Mandrels, Springback & Test Bends
Bending stainless exhaust tubing without wrinkles: when you need a mandrel, how to measure springback with a test bend, and how to back purge welds.

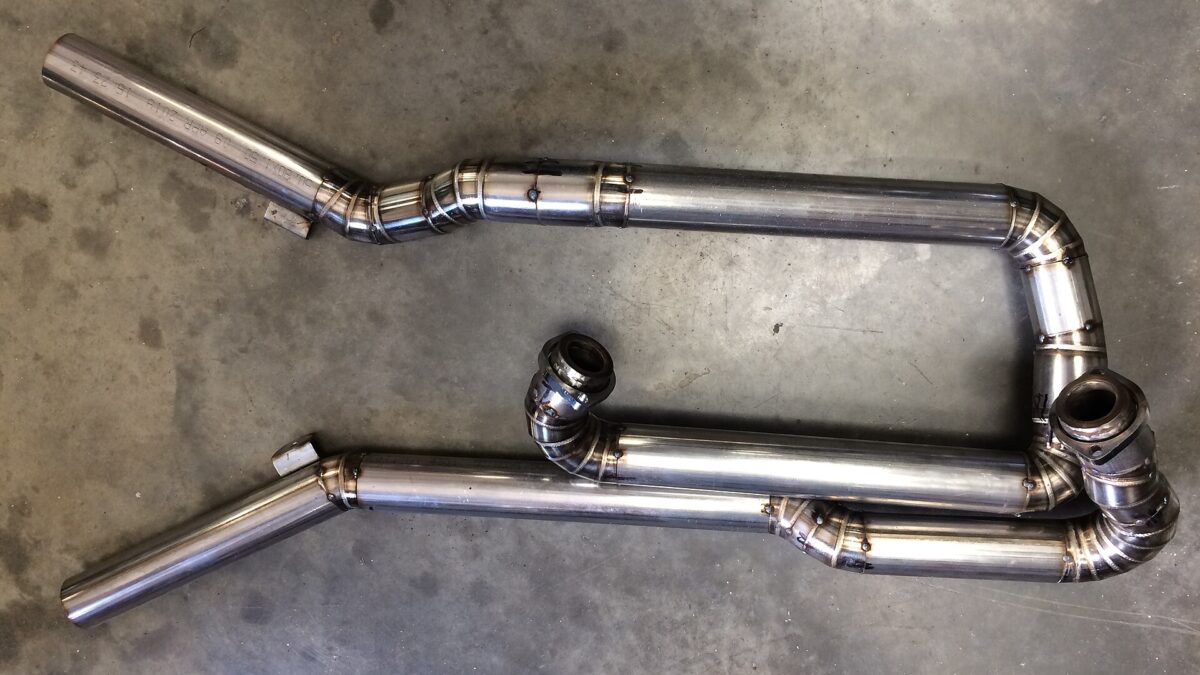
You’ve got a stick of shiny stainless, a plan for a new exhaust, and a nagging worry. What if the first bend wrinkles, flattens or springs back to the wrong angle? Bending stainless exhaust tubing is harder than bending mild steel. The tube is thin, it fights back as you bend it, and it isn’t cheap to waste.
The good news: stainless is predictable once you know its habits. This guide explains why it behaves the way it does, when you need a mandrel, and when you should just buy pre-bent sections. Then it teaches the one method that works on every bender: the test bend. You’ll learn how to measure springback yourself instead of trusting a number from the internet.
A quick word on numbers. You’ll find plenty of “stainless needs X tons” and “it springs back Y% more” claims online. We couldn’t find a trustworthy published source for figures like those, so we left them out. Where we do quote a number, it comes from a bender maker, a tubing supplier or a trade publication, and we link it.
Thin-wall stainless exhaust tube almost always needs mandrel support for tight bends. Most garage builders buy pre-bent 304 mandrel bends and cut them to fit.
- Expect more springback than mild steel, and measure it with a test bend for every material and die.
- Lubricate and go slowly. Stainless work-hardens and can gall on dry tooling.
- Back purge your welds with argon so the inside doesn’t “sugar.” Silicone purge plugs make it easy.
📋 In this guide
- Why stainless fights back
- Know your grade
- Bend it or buy it? The mandrel question
- Tooling, lubrication and cleanliness
- The test-bend method, step by step
- Reading your test bend
- Cutting and fitting bends
- Welding and back purging
- Real-life lessons
- Common mistakes and fixes
- Pro tips
- FAQ
- Your stainless bending checklist
Why stainless fights back
If you’ve bent mild steel, stainless will feel familiar at first. Then it surprises you. Three habits explain almost every problem.
1. It work-hardens
Austenitic stainless grades like 304 and 316 get harder as you bend them. Rogue Fabrication’s stainless bending guide explains it simply. The outside of the bend stretches and hardens. The inside wall gets squeezed, and if the wall is thin compared with the bend radius, it can buckle. Supplier datasheets such as Smiths Metal Centres’ 304 sheet say the same: 304 hardens rapidly during cold work.
2. It springs back more
Springback is how much a bend relaxes when you let go. Rogue Fab says stainless springs back more than mild steel and considerably more than aluminum. It also says 316 tends to spring back slightly more than 304. But nobody publishes a reliable springback table for stainless tube. That’s why the test bend later in this guide matters so much.
3. It’s usually thin
Exhaust tube is thin for its size. Common stainless mandrel bends are listed at 16 gauge, or .065″ wall. A thin wall on a big diameter means the tube has little strength to hold its round shape. Without support from inside, it wrinkles on the inside of the bend and flattens on the outside.
Put those together and you get the stainless bending rulebook: support the wall, keep tooling smooth and lubricated, bend steadily, and measure springback instead of guessing.
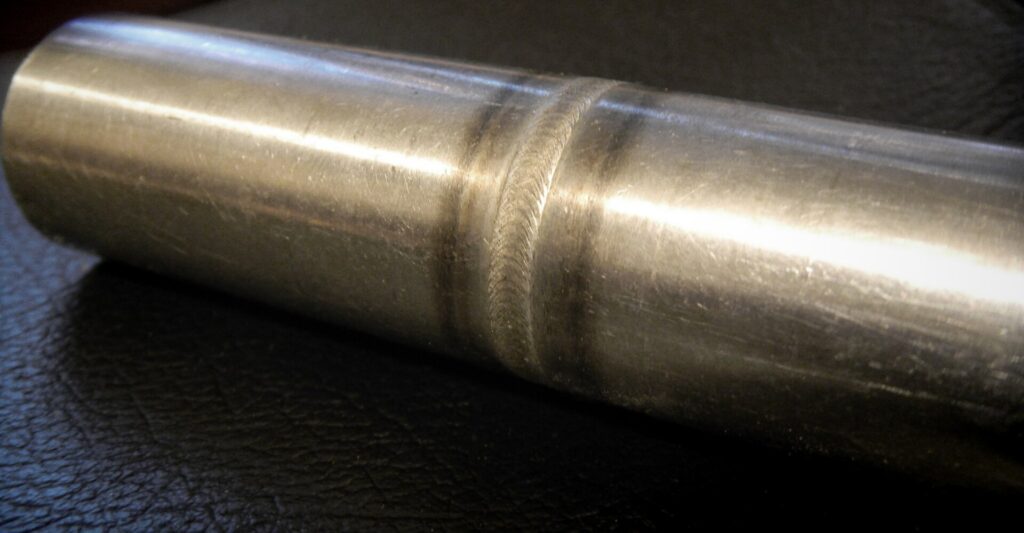
Stainless isn’t hard to bend because it’s strong. It’s hard to bend because it’s thin, it gets harder as you work it, and it never lands where mild steel would.
Know your grade: 304, 316, 321 and 409
“Stainless” covers several grades, and they don’t all bend or weld the same way. Before you bend anything, find out exactly what you have. Here’s a quick guide to the grades you’ll meet in exhaust work.
| Grade | Type | Where you’ll see it | Bending notes |
|---|---|---|---|
| 304 / 304L | Austenitic 18-8 | Most aftermarket stainless mandrel bends and tubing | Work-hardens quickly; springs back more than mild steel |
| 316 / 316L | Austenitic | Sanitary and marine tube | Rogue Fab: springs back slightly more than 304 |
| 321 | Austenitic, titanium-stabilized | Turbo manifolds and hot headers | No published tube springback figure found; test-bend it |
| 409 | Ferritic, about 11% chromium | Exhaust systems built for value | Magnetic; treat as stainless and test-bend |
For most hobby exhaust builds, you’ll be working with 304. Tubing supplier Burns Stainless recommends 304 for street and endurance headers and 321 for turbo systems. Our aluminized vs stainless exhaust tubing guide compares the grades in more depth.
How to check what you have: start with the listing or the mill certificate. If you bought used tube, a magnet helps. Ferritic 409 is magnetic. Austenitic 304 is essentially non-magnetic when annealed, though bent areas can become slightly magnetic from cold work. Write the grade on the tube in paint marker before it goes in the rack.
Why it matters: each grade gets its own springback number, its own filler metal and its own heat limits. Mix them up and your notes and settings are wrong from the start.
Bend it or buy it? The mandrel question
This is the most important decision in the whole project. Get it right and everything else is easier.
When you need a mandrel
A mandrel is a support that sits inside the tube at the bend. It holds the wall round while the tube is drawn around the die. Rogue Fab’s exhaust bender guide suggests a mandrel for 304 stainless exhaust when the wall factor is above 20 or the D of bend is below 3.0. Wall factor is OD ÷ wall. D of bend is CLR ÷ OD. Both come from Pro-Tools’ explanation, and our wall factor guide walks through them.
| Tube OD | Wall (16 ga) | Wall factor | Mandrel suggested by Rogue Fab’s guidance? |
|---|---|---|---|
| 1.75″ | .065″ | 26.9 | Yes (wall factor above 20) |
| 2.00″ | .065″ | 30.8 | Yes |
| 2.25″ | .065″ | 34.6 | Yes |
| 2.50″ | .065″ | 38.5 | Yes |
| 3.00″ | .065″ | 46.2 | Yes |
See the pattern? Every common exhaust size in 16 gauge is over 20. So by that guidance, nearly all stainless exhaust bending is mandrel work, whatever the radius. The Fabricator gives a similar example: 2″ × .065″ tube on a 4″ CLR has a wall factor of about 30.8 and a D of 2.0. Its mandrel chart lookup calls for a two-ball mandrel with a wiper die (The Fabricator).
What about a hardware-store pipe bender?
Skip it. Bottle-jack “pipe benders” press the middle of the tube and crush thin wall. Harbor Freight’s own manual for its 12-ton bender says it isn’t intended for thin-wall pipe such as exhaust. Our mandrel vs crush bending guide explains why.
So should you buy pre-bent?
For most garage builders, yes. Pre-bent mandrel U-bends, J-bends and elbows give you perfect, round bends. You cut, fit and weld. You only need your own mandrel bender if you build exhausts often. Here’s an example of a well-specified stainless bend. We haven’t handled it; it’s chosen from published listing specs and what owners commonly report. See how we evaluate equipment.
As an Amazon Associate I earn from qualifying purchases.
2.5″ 304 stainless 90° mandrel bend, 1.5D
2.5″ Stainless 90° Mandrel Bend, 1.5D / 3.75″ CLR, 16GA, SS304
A loose-radius 304 bend with unequal legs, so you have room to trim and fit.
This listing spells out everything you need to plan a cut: OD, CLR, wall, leg lengths and grade. A 1.5D bend is a common exhaust radius. It’s gentler than a 1D “tight” bend but still far tighter than you could bend thin stainless without a mandrel.
Who it’s for: anyone building a 2.5″ stainless exhaust who doesn’t own a mandrel bender.
Why we picked it: clear published specs, and two leg lengths that leave fit-up room.
- Material
- 304 stainless
- OD
- 2.5″
- CLR
- 3.75″ (1.5D)
- Wall
- 16 gauge / .065″
- Legs
- 5″ and 8″
- Bend
- 90°
Why we like it
- Full specs in the listing title
- Round, wrinkle-free mandrel bend
- Legs leave room to trim
Know before you buy
- One fixed radius; buy the size your design needs
- You still need TIG and a back purge to weld it well
- Confirm the seller and specs before ordering
Tighter option: Vibrant 13040 T304 90° (2.5″ OD, 3.5″ CLR). Affiliate links. See our disclosure.
Tooling, lubrication and keeping stainless clean
If you do bend your own, your tooling matters as much as your technique. Stainless punishes rough or dry tooling.
Mandrel material
Rogue Fab names bronze as the standard mandrel material for stainless. It’s hard enough to support the wall under load, but soft enough not to score the inside of the tube. If you’re shopping for a home mandrel setup, ask what the mandrel is made of, and whether the maker sells mandrels sized for your tube.
Lubrication
Lubricant isn’t optional. Rogue Fab’s mandrel bending page says lube at the mandrel nose is critical. Without it, the mandrel drags against the tube wall as it’s pulled out and can damage the inside of the bend. Its cage-building guide adds that lubricant reduces galling and gives cleaner bends. Use a bending lube made for the job, and check that it’s safe for your mandrel material. Rogue Fab says its Bend All 004 has nearly zero reactivity with bronze, for example.
Keep it clean
Many fabricators keep separate wire brushes, flap discs and files for stainless. The idea is to avoid rubbing plain-steel particles into the surface, where they can rust and stain. Wipe dies and the tube before each bend. Grit trapped between the die and the tube leaves marks you’ll see on polished stainless.
Bend steadily
Pull or push the bend in one smooth motion where your bender allows it. A steady, repeatable motion makes your results easier to repeat. Rogue Fab also sells a thin-wall roller upgrade for its benders and advertises it as cutting outside-bend deformation from 10.0% to 6.4% with regular dies. That’s a maker’s figure, but it shows how much tooling choices matter.
Because stainless work-hardens, bending a section back and forth makes it harder and more likely to crack. Sneak up on your angle from below. If you overshoot badly, it’s often better to start a fresh piece.
Bending stainless exhaust tubing: the test-bend method, step by step
This is the heart of the guide. Springback isn’t a fixed number. It changes with grade, wall, die, machine and even the batch of tube. Pro-Tools’ springback article goes as far as recommending you log the heat or batch number from the mill certificate. So instead of hunting for someone else’s number, measure your own.
- Cut a test piece. Use the same grade, OD and wall as your project. Make it long enough to clamp and to measure both legs.
- Measure and mark it. Check OD and wall with calipers. Draw a straight reference line along the tube so you can see any rotation.
- Lube and load. Lubricate as your bender’s maker recommends, load the tube and clamp it firmly.
- Bend to a known target. Bend steadily to 90° on the degree ring or stop.
- Release and measure. Let the tube relax fully, then measure the real angle with a digital angle finder or protractor.
- Work out the offset. Subtract the measured angle from the target. That’s your springback for this combination.
- Confirm with a second bend. Bend a fresh piece to 90° plus your offset. Measure again and adjust if needed.
- Log it. Write down grade, OD, wall, die, CLR, machine, batch and offset. That line in your notebook is worth more than any chart.
Here’s what that looks like in numbers. Rogue Fab’s Bending 101 guide shows a bend made to 90° that read 86.5° after release. It then over-bends to 93.5° so the tube lands at 90°. That example is mild steel, and Rogue Fab notes that springback differs for every material. Your stainless number will be different, which is exactly why you test.
Some benders also deflect under load. Baileigh’s RDB-175 manual describes bending until you get a true 90°, then noting what the machine reads, and using that offset from then on. Its example reads 105°, which includes machine flex as well as springback. Our springback guide has more on calibrating a bender.
Springback isn’t always the same at 45° as at 90°. If your project has both, test both. Many bending programs calibrate from two test bends and fill in the angles between.
Reading your test bend: wrinkles, flat spots and cracks
Your test piece tells you more than springback. Look at it closely before you bend the real part. Here’s what to check and what each problem means.
Ovality (flattening)
Ovality measures how far the tube has gone out of round. Measure the biggest and smallest diameter across the bend with calipers. Then use: ovality % = (max − min) ÷ nominal OD × 100. For example, a 2.5″ tube that reads 2.55″ and 2.45″ is 4% oval. Acceptable limits depend on the job. The Fabricator cites tolerances from about 1.5% to 8% depending on end use. Our ovality guide explains the measurement in detail.
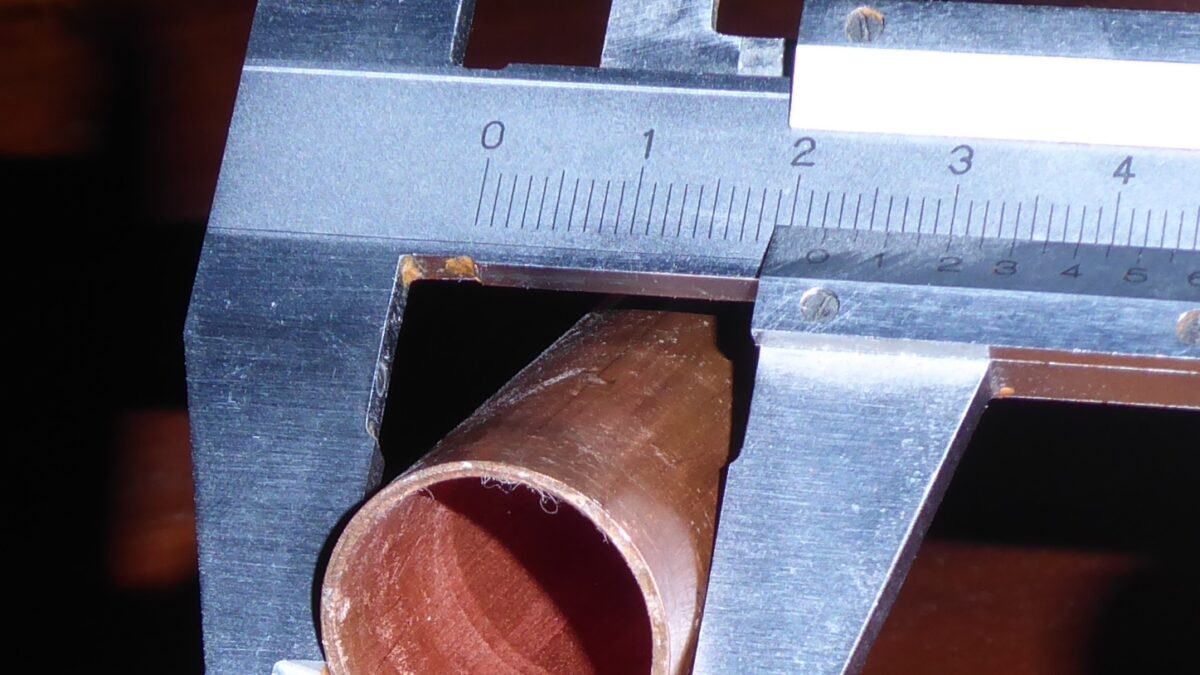
| What you see | Likely cause | What to try |
|---|---|---|
| Wrinkles on the inside | Thin wall not supported; radius too tight for the setup | Add a mandrel and wiper, or buy pre-bent |
| Flat outside of the bend | No internal support; tube collapsing | Mandrel support; check die fit to the tube OD |
| Scratches or galling | Dry or dirty tooling | Clean dies, use the right lubricant |
| Angle short of target | Springback | Over-bend by your measured offset |
| Bends not in line | Tube rotated in the die | Reference line; clamp firmly |
| Cracks on the outside | Too much stretch or re-worked metal | Larger radius, fresh tube, no back-and-forth bending |
Wall thinning also happens on the outside of every bend, while the inside gets thicker. We couldn’t find a simple, reliable formula for how much. Treat it as a reason to avoid radii tighter than your design needs. If your test piece wrinkles, add support or buy pre-bent rather than forcing it.
Cutting and fitting stainless bends
Most stainless exhausts are built from pre-bent pieces, so cutting and fit-up are where the real work happens.
Know where the bend starts
Every mandrel bend has a straight leg, then the arc. To cut a bend to a smaller angle, you need to know how long the arc is. The math is simple: arc length = CLR × angle in radians. For a 90° bend on a 3.75″ CLR, that’s 3.75 × 1.571 = about 5.89″ along the centerline. For a 45° piece, it’s half that. The tangent length, from where the bend starts to where the straight lines would meet, equals the CLR for a 90° bend.
Plan cuts, then add a little
Stainless Headers‘ cut-length tools suggest leaving about 1/4″ for fit-up trimming. That small allowance saves a lot of short pieces. Our bend calculator works out arc, tangent and cut lengths for you. If you want to see the geometry, the geometry visualizer draws it.
Cut square and deburr
Thin stainless needs a square, clean cut for good TIG welds. A fine-tooth saw, a cut-off wheel kept for stainless, or a tube cutter all work. Deburr inside and out. Tight fit-up matters on thin wall. Gaps make thin-wall welds much harder to control.
Tack and check
Tack the pieces, then check angles and clearances on the car before final welding. Remember that the purge has to be in place before you tack, so plan your purge plugs and dams early. Our exhaust tube cut length guide has worked examples.
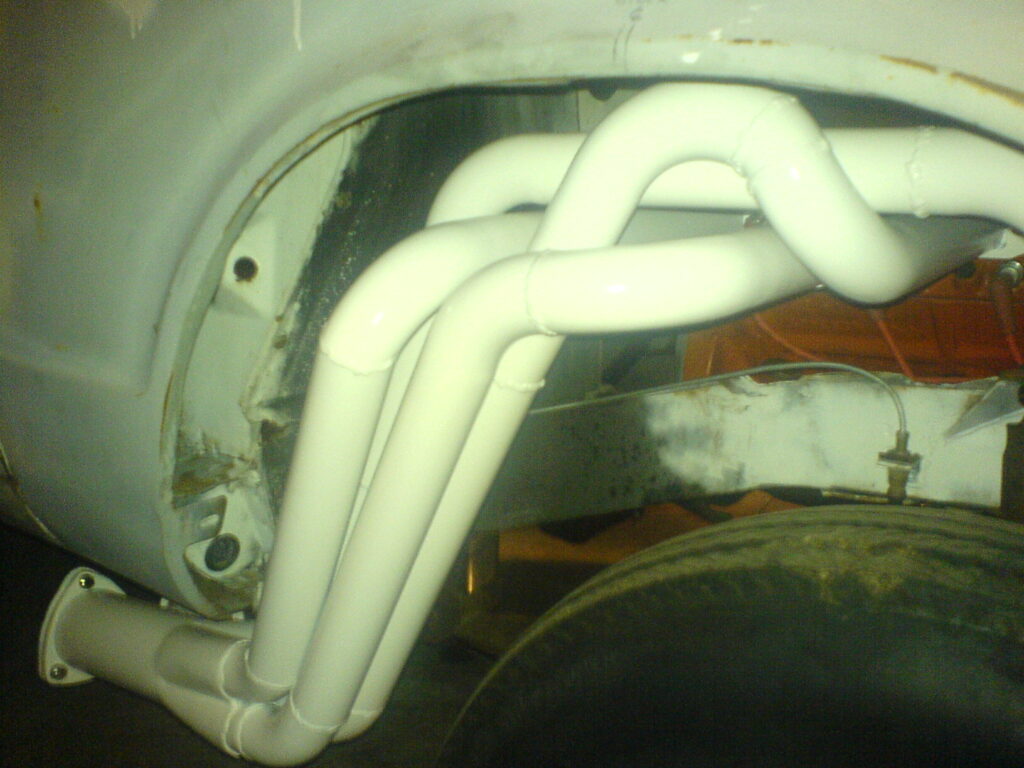
Welding bent stainless: back purging basics
Your bends can be perfect and the exhaust can still fail at the welds. On thin stainless, the inside of the weld is the problem area.
What “sugaring” is
When the back of a stainless weld meets air, it oxidizes into a crusty, grainy surface. Welders call it sugaring. Miller says sugaring weakens the joint and compromises corrosion resistance. Its fix is to back purge the weld with argon, or to reduce amperage.
How to back purge an exhaust tube
Plug both ends of the section you’re welding, feed argon in one end, and let it vent out the other. Let the purge run long enough to push the air out before you tack. Silicone purge plugs with built-in gas fittings make this quick on exhaust tube. Keep the purge running until you’ve finished welding.
Silicone back purge plugs for exhaust tube
Tig Aesthetics by Ticon Industries Silicone Back Purge Plugs, Exhaust Tubing Kit (2.5″ to 4″)
Pairs of silicone plugs with diffusers and argon inlet tubes, sized for common exhaust diameters.
This kit covers the exhaust sizes most people build in. Each plug seals the tube end, and the fittings let argon in gently and let air out.
Who it’s for: anyone TIG welding stainless or titanium exhaust tube in 2.5″ to 4″ sizes.
Why we picked it: the listing clearly states the contents, and the brand says the high-temperature silicone can withstand the heat of a weld seam from 1″ away.
- Plug sizes
- 2 each: 2.5″, 3″, 3.5″, 4″
- Diffusers
- 8 stainless mesh
- Gas inlets
- 4 titanium inlet tubes
- Material
- High-temperature silicone
- Heat note
- Brand: withstands a weld seam 1″ away
Why we like it
- Covers the common exhaust sizes
- Diffusers for a gentle argon flow
- Reusable
Know before you buy
- No 2″ or 2.25″ plugs in this kit
- Keep plugs back from the weld zone
- You still need an argon regulator and hose
No argon for the purge? Harris Type B Solar Flux is a back-side flux for stainless. Affiliate links. See our disclosure.
Filler and flux
Burns Stainless pairs 304 with 308 filler, and recommends 347 filler for 321. Back-side flux is the alternative to gas. Harris says its Type B Solar Flux is mixed with alcohol, brushed onto the back of the joint, and shields it from oxygen. It’s sold for stainless steels, except 309 and 310. Users report it works on exhaust tube but is a chore to clean off afterward. For the best welds, argon purging is still the usual choice. Read our workshop safety notes before you weld.
Real-life lessons from stainless builders
These are composite stories. The same situations come up again and again in garage-fab forums and build threads. Each one costs someone a stick of stainless, so you don’t have to.
A builder needs one 2.5″ bend in stainless and owns a bottle-jack pipe bender. The tube flattens into an oval and wrinkles on the inside. A second try goes the same way.
Lesson: thin stainless needs mandrel support. For a single bend, a pre-bent mandrel elbow is cheaper than another stick of tube.
Someone bends 304 on a rotary-draw bender using the over-bend they’d logged for mild steel. Every bend comes out short. They do one test bend, measure the real offset and the rest of the parts line up.
Lesson: every material gets its own test bend and its own line in the log.
A first stainless header has beautiful welds on the outside. Looking inside with a light, the builder finds crusty, black sugaring at every joint. The tubes were welded without a back purge.
Lesson: purge every stainless joint. The inside of the weld matters as much as the outside.
Common mistakes (and how to fix them)
Here are the stainless bending mistakes that come up most often in build threads, with the fix for each.
❌ Bending thin-wall stainless without a mandrel. The tube wrinkles and flattens.
✅ Fix: check wall factor and D of bend. If you’re past Rogue Fab’s guidance, use a mandrel or buy pre-bent.
❌ Using a mild-steel springback number. Stainless springs back more.
✅ Fix: do a test bend for every grade, wall, die and batch, and log the offset.
❌ Bending dry. Stainless galls and scratches on dry tooling.
✅ Fix: clean the dies and use a lubricant made for bending, especially at the mandrel nose.
❌ Bending the same spot back and forth. Work hardening makes it stiffer and more likely to crack.
✅ Fix: creep up on the angle. If you overshoot a lot, start a fresh piece.
❌ Welding without a back purge. The inside sugars and loses corrosion resistance.
✅ Fix: plug the tube and purge with argon, or use a back-side flux made for stainless.
❌ Cutting pre-bent sections by eye. Pieces come out short.
✅ Fix: work out arc and tangent lengths first, and leave about 1/4″ for trimming.
❌ Ignoring the batch. A new batch springs back differently from the last.
✅ Fix: log the heat or batch number from the mill cert, as Pro-Tools suggests, and re-test when it changes.
Pro tips for bending stainless exhaust tubing
These habits come up again and again in good build threads. They’re cheap, and they make your stainless parts look professional.
- 💡 Buy one extra bend or stick. Test pieces pay for themselves the first time they save a project part.
- 💡 Keep a bend log. Grade, OD, wall, die, CLR, machine, batch and offset, every time.
- 💡 Draw a reference line. It shows rotation in the die and helps you set the angle between bends.
- 💡 Choose the gentlest radius that fits. A looser radius is kinder to thin stainless and easier to weld into a system.
- 💡 Plan purging before you tack. It’s much harder to add plugs once pieces are joined. Sketch the system and mark where each plug and vent will go.
- 💡 Protect the finish. Wrap clamp areas or use clean dies so polished tube stays polished. Scratches are far easier to prevent than to buff out later.
- 💡 Know your terms. Our glossary explains CLR, wall factor, D of bend and ovality in plain English.
Experienced builders bend a test piece from every new box or batch of stainless before touching the project tube. It takes minutes, and it catches springback changes before they cost a part.
Frequently asked questions
Can you bend stainless exhaust tubing without a mandrel?
Only gentle bends on thicker wall. Rogue Fab suggests a mandrel for 304 exhaust when wall factor is above 20 or D of bend is below 3.0. Common 16-gauge exhaust sizes are all above 20, so most need a mandrel.
How much does stainless spring back?
More than mild steel, but there’s no reliable published number for tube. It depends on grade, wall, die, machine and batch. Measure it with a test bend and log the result.
Can I use a hydraulic pipe bender for stainless exhaust?
Not well. Ram-style pipe benders crush thin wall. Harbor Freight’s manual for its 12-ton bender says it isn’t intended for thin-wall pipe such as exhaust.
Is 316 harder to bend than 304?
It tends to spring back slightly more than 304, according to Rogue Fab, because it work-hardens faster. Test-bend it separately.
Do I need to back purge stainless exhaust welds?
For the best results, yes. Miller says sugaring on the back side weakens the joint and hurts corrosion resistance. Purge with argon, or use a back-side flux made for stainless.
Should I buy pre-bent mandrel bends instead?
For most garage builders, yes. Pre-bent bends are round and wrinkle-free. You cut, fit and weld them, and skip the cost of a mandrel bender.
Your stainless bending checklist
Before you bend or cut your project tube, run through this list.
- I know the grade of my tube (304, 316, 321 or 409)
- I’ve measured OD and wall with calipers
- I’ve worked out wall factor and D of bend for each bend
- I’ve decided: mandrel bend it myself, or buy pre-bent
- My dies are clean and I have the right bending lubricant
- I’ve done a test bend and logged the springback offset
- I’ve checked my test piece for wrinkles, flat spots and ovality
- I’ve worked out arc, tangent and cut lengths, plus trim allowance
- I have purge plugs and argon (or back-side flux) ready before tacking
- I have the right filler for my grade
Stainless rewards patience. Support the wall, keep the tooling clean, test before you commit and purge every weld. Do that, and your exhaust will look like it came from a pro shop. 🔥
Plan your stainless bends first
Work out wall factor, D of bend, arc and cut lengths before you touch the tube. Or see the geometry drawn out.
Keep reading
Exhaust Tube Cut Length: Step-by-Step Maths for J-Bends and U-Bends
Work out exhaust tube cut length the easy way: arc and tangent formulas, plus three worked J-bend and U-bend examples with every…
Buy Mandrel Bends vs Bend Your Own Exhaust: An Honest Guide
Buy mandrel bends vs bend your own exhaust? Compare effort, tools and results, then build a system from pre-bent U-bends step by…
How to Measure and Lay Out Tube Bends (With Worked Examples)
How to measure and lay out tube bends: centerline sketches, tangent and arc math, cut length, bend marks and a test bend,…